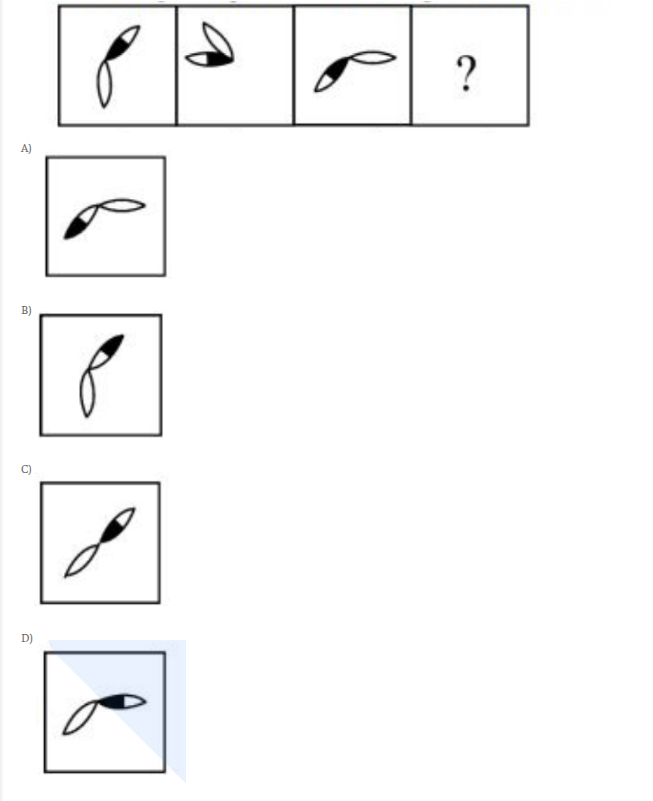
From the given options in image_25dab9.png, select the figure which will be most suitable to be placed in the last square.
- AA
- BB
- CC
- DD
Solution & Step-by-step Explanation
By observing the pattern of rotation of the shaded loop and the overall figure in image_25dab9.png:
1. The entire figure rotates in a systematic manner.
2. The position of the half-shaded loop moves sequentially in a counter-clockwise direction around the central axis (from top-right to left, then to bottom-left).
3. Following this sequence, the next position of the shaded loop must point towards the right side horizontally, with the rest of the figure adjusting accordingly. This perfectly matches the figure shown in option D.
1. The entire figure rotates in a systematic manner.
2. The position of the half-shaded loop moves sequentially in a counter-clockwise direction around the central axis (from top-right to left, then to bottom-left).
3. Following this sequence, the next position of the shaded loop must point towards the right side horizontally, with the rest of the figure adjusting accordingly. This perfectly matches the figure shown in option D.